How to Install Deck Railing
Getting Started With Your Decking
Introduction
When it comes to installing deck railing, the first thing that most people think of is the railing. Oftentimes, the deck is what gets overlooked in the planning process, creating headaches when installing your deck railing. Luckily, we have gone through the process for you! Follow our step-by-step process from start to finish to navigate common pitfalls that many homeowners fall into when undertaking a deck installation or remodel. Not quite ready for install, learn how to revitalize your deck before installation!
From overall evaluation of existing wood decking structure, to recommendations on tools or products, it is our goal to provide insight into both your project and the building industry! Get informed andand become a DIY’er for a successful deck railing project.
How to Gather Basic Measurements
How to Identify Blocking
What is Blocking & Bridging?
Getting Deck Railing Advice
Installing a Deck Railing System
Step 1 – Checking Your Drawing
Step 3 – Checking System Leveling
Step 4 – Pre-Drilling Mounting holes
Step 6 – Attach the Handrail Bracket
Installing a Hollow Mounting Bracket KitMeasuring For Deck Railing
Once you have determined the style of Mounting you would like for your Railing Posts, the next step is to take basic measurements for your overall system. The maximum distance that cable railing wire can travel unsupported is 48 inches, or 4 feet. With this in mind, grab a tape measure and measure the distance that your future cable railing system will travel.
It may help you visualize where you will anchor your posts by putting down painter’s tape every 4 feet. Additionally, whenever there is a transition in your deck railing either up or down, you will need to determine if you need to start a new run.An example of starting a new run would be if there are 2 platform areas on your deck. An example of continuing the former run would be if you are moving up or down stairs. If there is transition in elevation that leads to a continued level run, you will need to add an extra post for the transition.
How to Identify Blocking for Decks
Once you have completed your basic measurements, the steps are as follows:- Ask yourself: “Am I able to access the underside of my deck?”
- Determine if there is blocking underneath your deck
- If you find that you do not have sufficient blocking add the necessary pressure treated lumber underneath your decking for support.
Evaluating Blocking & Deck Safety
What is Blocking & Bridging for Decks
Before you begin your project, the very first step is evaluating your existing structure. Just like a house railing systems cannot be built without sufficient structure underneath them. There are two important components to sufficient railing structure: Blocking & Bridging. BLOCKING is what frames the structure of your deck from the underside. BRIDGING is when blocking occurs between the joists at mid-span. Most deck builders will take scrap pieces of pressure treated lumber as the fill-in for the bridging, aiding not only in the structural support, but also in reducing the risk of premature decay. Additionally, bridging at mid-joist reduces bounce within your deck, giving more stability to the overall structure. Another blocking technique involves reinforcing the perimeter joists with an additional board.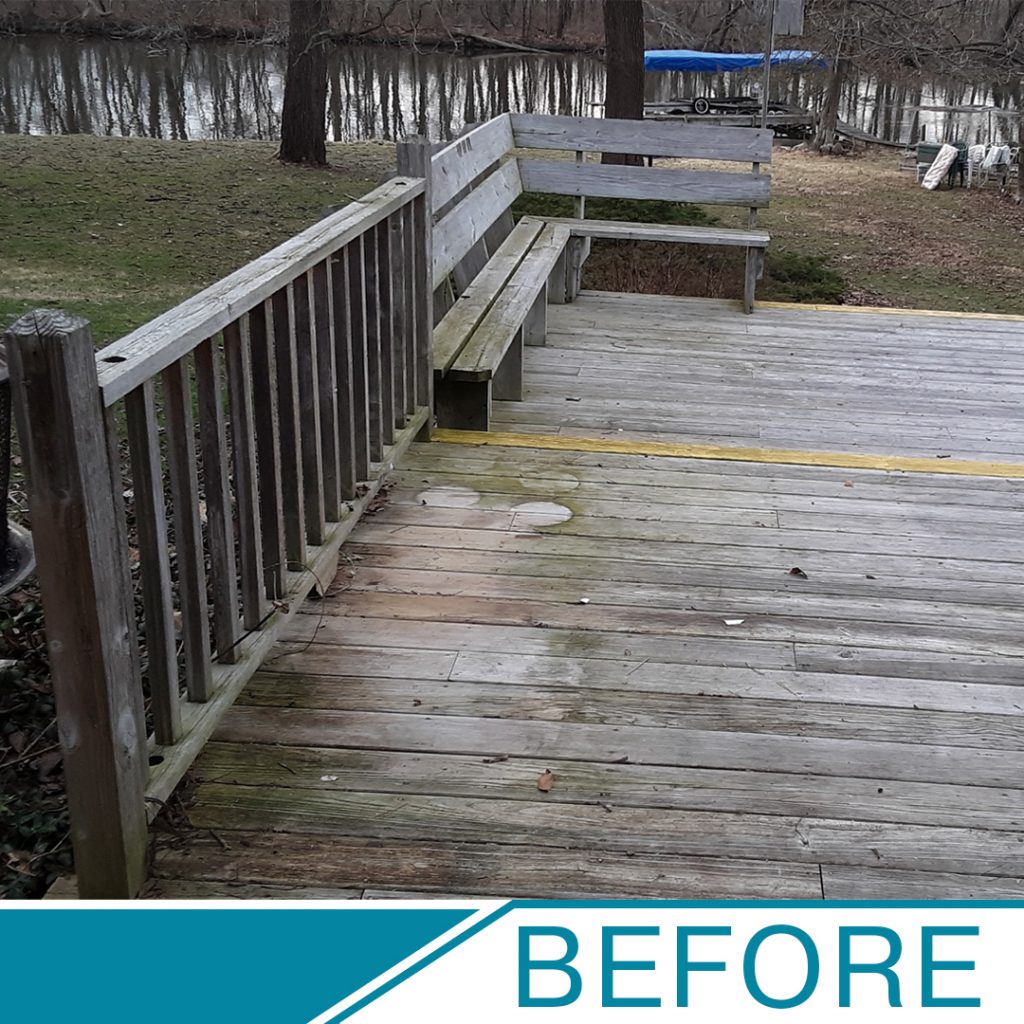
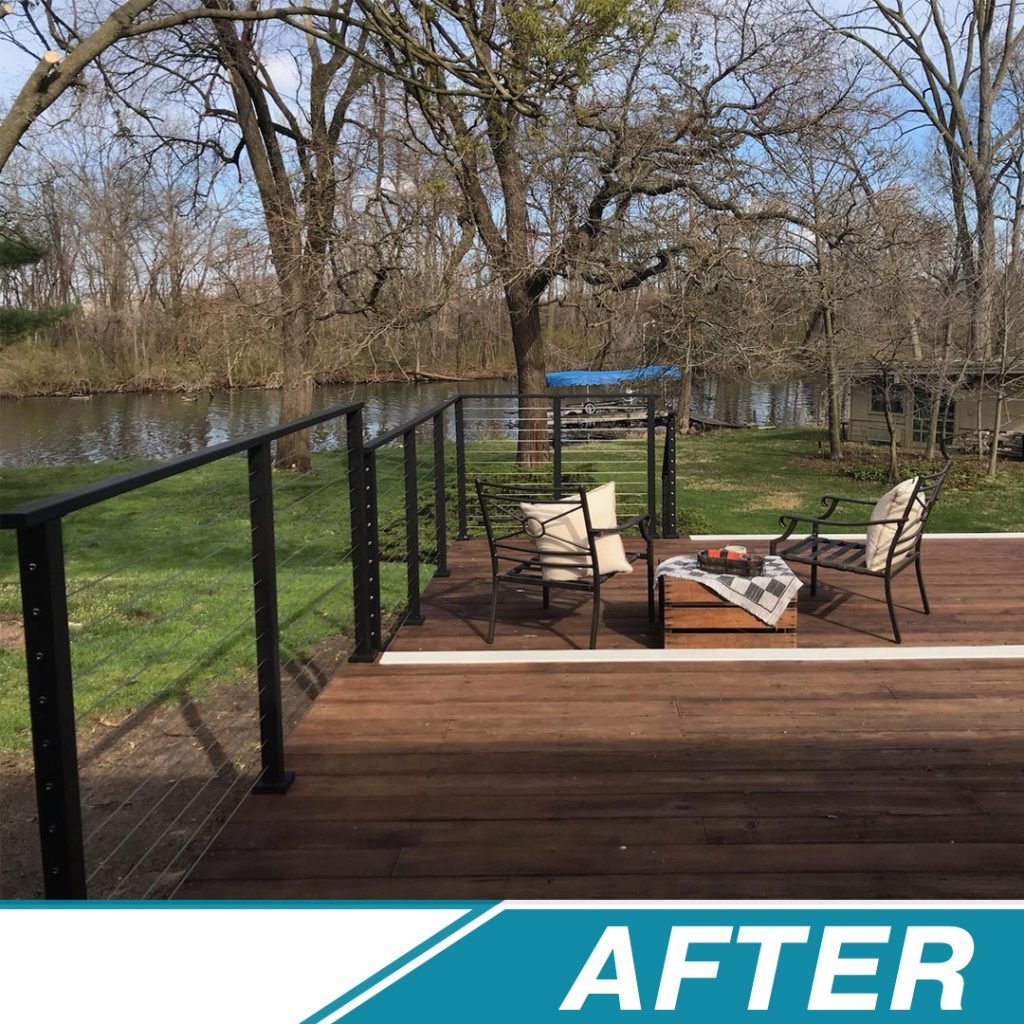
Getting advice
An example of how invaluable the advice of a carpenter can be is seen in this recent remodel. This deck was built with pressure treated pine 20 years ago. The previous homeowners took care of it, maintaining an oil-based seal on it for nearly 17 years. However, neglected to maintain it for the past 3 years. As seen in the “before” picture, the UV damage and overall weathering took a toll on much of the deck. At first, these homeowners thought that the deck would need to be completely gutted and torn out; but after an evaluation from a professional deck builder, they were advised to keep everything. All that was needed was a good power wash, some deck cleaner and brightener for restoration of the wood, sanding, and new stain. As can be seen from the “after” picture, the transformation is quite remarkable. It doesn’t even look like the same deck.Evaluating Deck Safety
An overall evaluation of your deck’s blocking will provide much needed insight into how you will navigate mounting your deck railing. Our railing systems are most frequently surface mount systems, relying on sufficient blocking on the perimeter. While we do have side-mount systems and hollow mount kits that can circumvent issues with insufficient perimeter blocking, we recommend reinforcing your blocking from underneath, if possible. This will save you time and energy later when installing your deck railing. Additionally, it provides the optimal conditions for ensuring safety of your overall system. Finally, it may prove beneficial to consult a trusted carpenter or contractor for a second opinion on how to best accomplish your project. Oftentimes, a consultation can help you determine how much of your deck is salvageable and how much needs to be replaced. We also offer a general guide on deck railing code & safetyInstalling Deck Railing
What Kind of Deck Railing are You Installing?
After you have evaluated your deck, the next step is determining which kind of deck railing & post mount you would like to use for your railing system. Your posts are the vertical structures that anchor into your blocking, supporting your cable railing system. The two types of mount styles are Surface Mount and Side Mount.Deck Surface Mount
Deck Surface Mount Posts are attached to and anchored on the surface of the deck. This is our most common method of railing install.Deck Side Mount
Deck Side Mount Posts are attached to and anchored on the side of the deck. Often referred to as our Fascia Mount, this style of mounting is not as common for railing system installation.Installing Your Deck Railing Posts
Step 1 – Checking your drawing
At this point, you probably have a drawing of where your posts are going to be placed. Refer to that drawing and place your posts at their locations, ensuring that each of the posts are no more than 48” away from each other, on center. This will help you visualize the project and make sure there are no unforeseen obstacles .
Step 2 – Using a speed square
To make sure your posts are level with the edges of your deck or balcony, use a speed square. As you are placing the post, that it is at least 1 ½” away from the edge of your blocking. When placing your angle posts, you’ll want to place them as close to 1 ½” away from your blocking as possible to make sure the bottom run of cable will clear the tread nosings.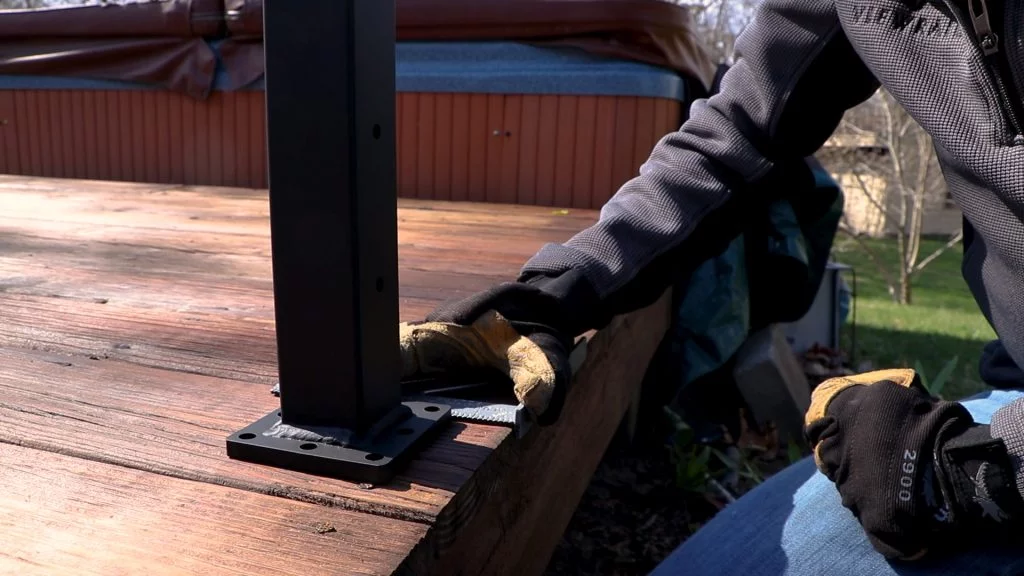
Step 3 – Checking System Leveling
Run the provided string along the edges of your post to check for a consistent line. If the line isn’t consistent you’ll have issues mounting your handrail. You should also run that string through the bottom holes on each of your angled runs to make sure the cable will clear the tread nosings. It may help to tape the string to a drill bit.Step 4 – Pre-Drilling Mounting holes
If possible, you always want to use the four corner holes. If that presents any issues, make sure to populate one hole on each of the four sides of the posts. Removing each of the posts, use a 3/16” drill bit to pre-drill all mounting holes.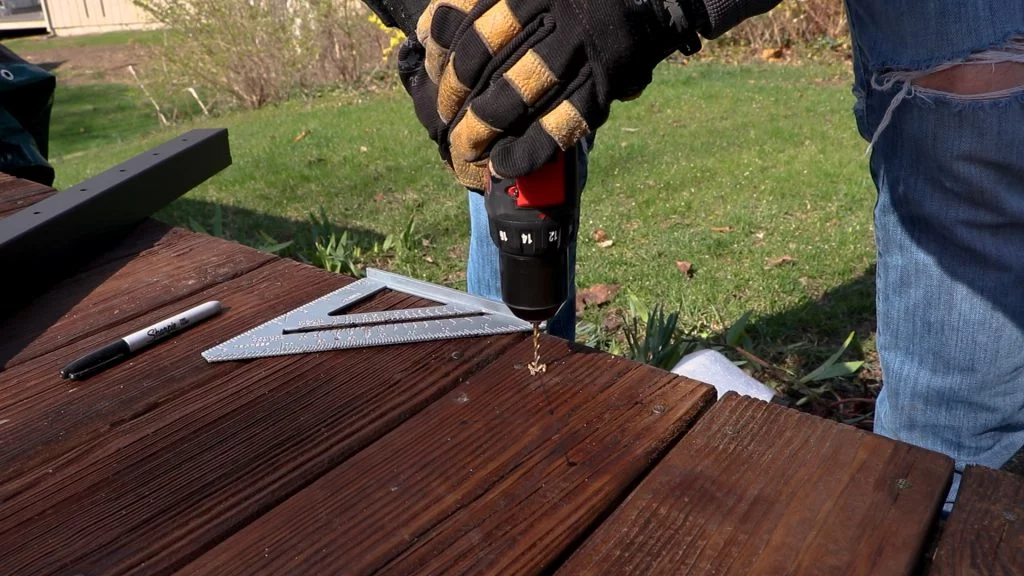
Step 5 – Mount & Level Posts
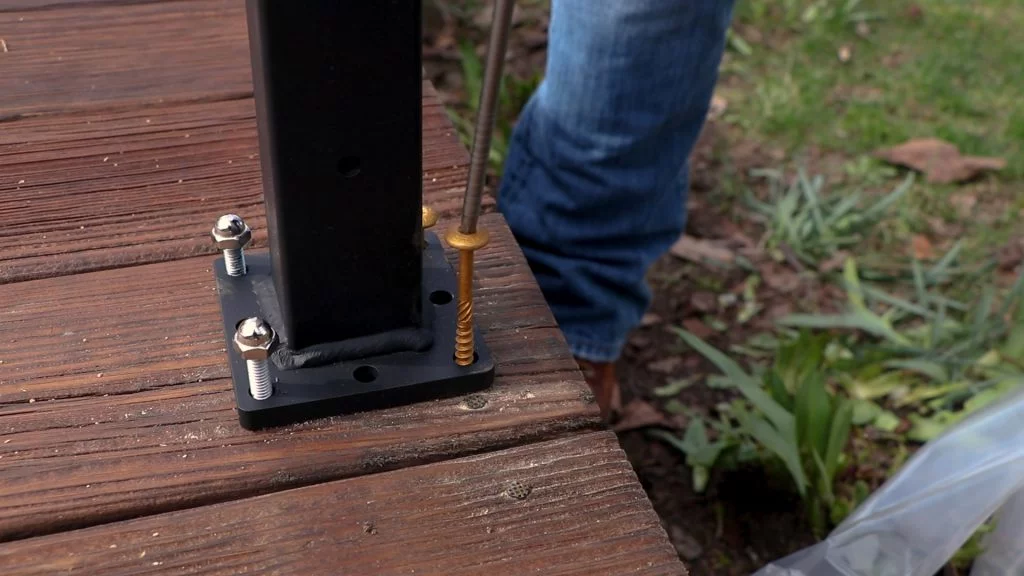
Replace the posts and populate all of your pre-drilled holes with the provided mounting screws. Place the post level onto a post and make sure the post is level. If it is not level, use the provided composite shims to level out the posts. Once it is level, slide your foot cover over the top of your post, making sure to let it down carefully so it doesn’t scratch the post. Repeat this step for each of your posts.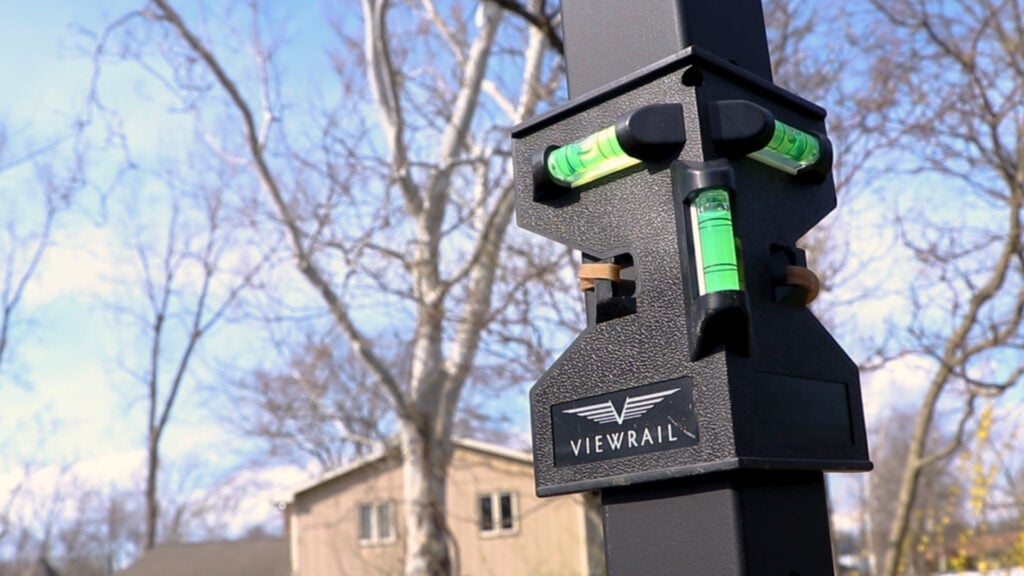
Step 6 – Attach the Handrail Bracket
Position the handrail bracket on top of your posts and attach it with the provided screws. If your system utilizes corner posts, make sure the bracket is oriented so that it turns the corner the correct way.Hollow Mounting Kit Installation
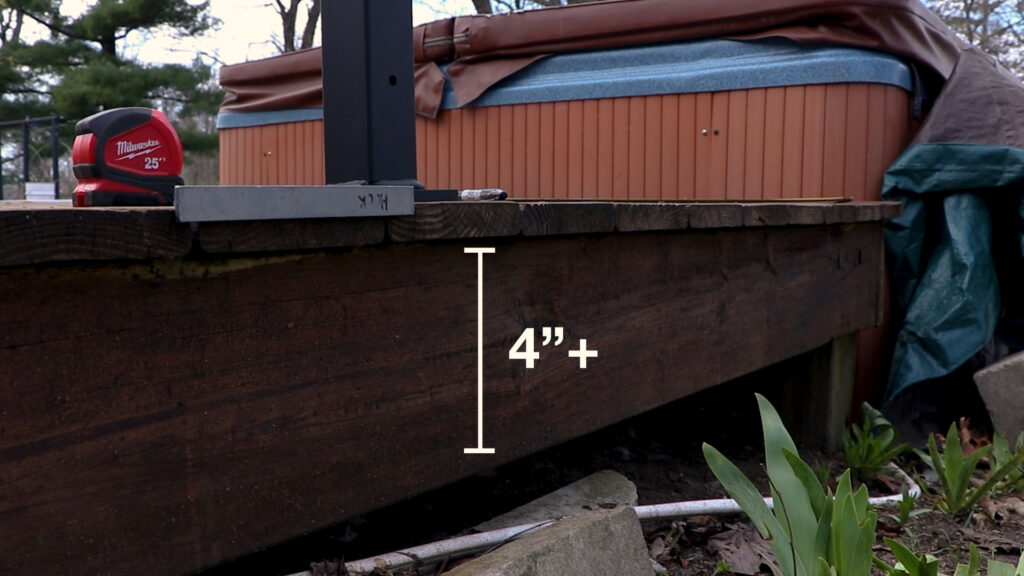
Hollow Mounting Bracket Kit – If you have at least 4 inches of blocking on one side, our Hollow Mounting Bracket can provide the necessary support for anchoring your Surface Mount Posts.
The Hollow Mounting Bracket contains 2 L-shaped metal brackets that anchor on the underside of your deck and provide stability to the inside of the post. With 6 inches of reinforcement, our Hollow Mounting Bracket gives you the reinforcement you need to meet safety code, as well as the stability to support your fully tensioned cable railing.
Hollow Mounting Bracket Instructions:
As a quick reminder, this product is only needed when you do not have sufficient blocking on one side of your posts. You will still need 4” of blocking on one side for your posts to meet code.
If you don’t have 4″ of blocking you’ll need to use our Hollow Mounting Bracket Kit. It’s to provide a strong artificial blocking for your deck railing posts. We provide the necessary components for the installation of your Hollow Mounting Bracket.
Tools Needed:
- A Speed Square
- A Sharpie
- A Line of String
- A 3/16” Drill Bit
- A 5/16” Drill Bit
- A Power Drill
- A 2” Hole Saw
- A 14mm Socket
- A Socket Wrench
Step 1 – Evaluate Your Post
Before the installation of your Hollow Mounting Bracket Kit, you will need to make sure that all of your posts are in a straight line. Use a speed square on each post to ensure that your post is square, as well as directly over sufficient blocking on one side. Stretching a line of string from one end post to the other is a great way to ensure your posts are in a straight line. If your string is flush along the feet, then your posts are in a straight line.Step 2 – Mark the Holes
Make sure that at least 2 of the holes are directly above sufficient blocking, on center. With your post standing upright and in line with your other posts, mark the 4 holes you will be drilling with a Sharpie. We typically recommend either 4 corners or 4 middles to get the best strength. Now, remove the post. Once you have removed the post, grab a speed square. Using your sharpie, draw an X connecting one pre-marked pilot hole to the opposite marked hole.. Mark the very center of the “X”. This will be the center of the Hole you will cut for access to the underside of your mounting structure.Step 3 – Drill the Holes
Now that you have marked all 5 pilot holes, grab a power drill. Using a 3/16” Drill Bit, drill your Pilot Holes for the anchor screws on sufficient blocking. Once you have done that, switch out your 3/16” Drill Bit for your 5/16” Drill Bit. Drill pilot holes for your Hollow Anchor Bolts, as well as for in the middle of the “X” for your Hole Saw. Once you have drilled all 5 holes, switch out your Drill Bit for your Hole Saw Attachment. Slowly and without much pressure, begin to drill out the center of your “X”. Once you are through, remove that piece of decking.Step 4 – Insert Your Mounting Bracket
Grab the supplied bolt and crown cap nut and put them into your pilot holes. Using a 14 mm socket, thread them through the pilot holes until they break through the bottom of the mounting structure. A great way to determine this is to feel the bottom of the structure as you are threading the bolt through. Now, take one of your mounting brackets and insert it into the hole. Make sure that you do not let go, as you could lose your mounting bracket. Holding firmly onto the bracket, continue to thread the bolt through the mounting bracket until it passes through the bottom of the bracket. Once the bolt is threaded through, the bracket will lock the bolt in place, allowing you to let go of the mounting bracket. Continue threading the bolt until there is only 1.5” remaining above the surface. If you are installing two of these, repeat these steps for the other Mounting Bracket. Otherwise, you can move forward to mounting your post.Step 5 – Mount Your Post
Now that both of your Mounting Brackets are installed, remove both of the crown cap nuts to allow you to put the post in place. Mount your post, ensuring that the pre-drilled holes for your cable railing are facing the correct direction. Re-attach the crown cap nuts and secure them to your post. Grab your remaining Mounting Screws and complete the mounting process of your post. Check for overall system leveling with your post level, adjusting as needed by loosening your screws or bolts and using the provided shims to level out the post. Once level, re-tighten all your mounting hardware and check again to make sure your post is now level.Installing & Mounting Handrail
Installing Your Handrail
You’ll need to bring a drill or impact driver, a 9/64” drill bit, painter’s tape, a tape measure, a writing utensil, a mallet, two clamps, and a chop saw.Step 1 – Measuring Handrail
Start by measuring the length of handrail you’ll need for your first run. For end posts, you’ll measure from the outside of the handrail bracket on the post. If your handrail will end on a corner post, you’ll have two handrails attached to that post.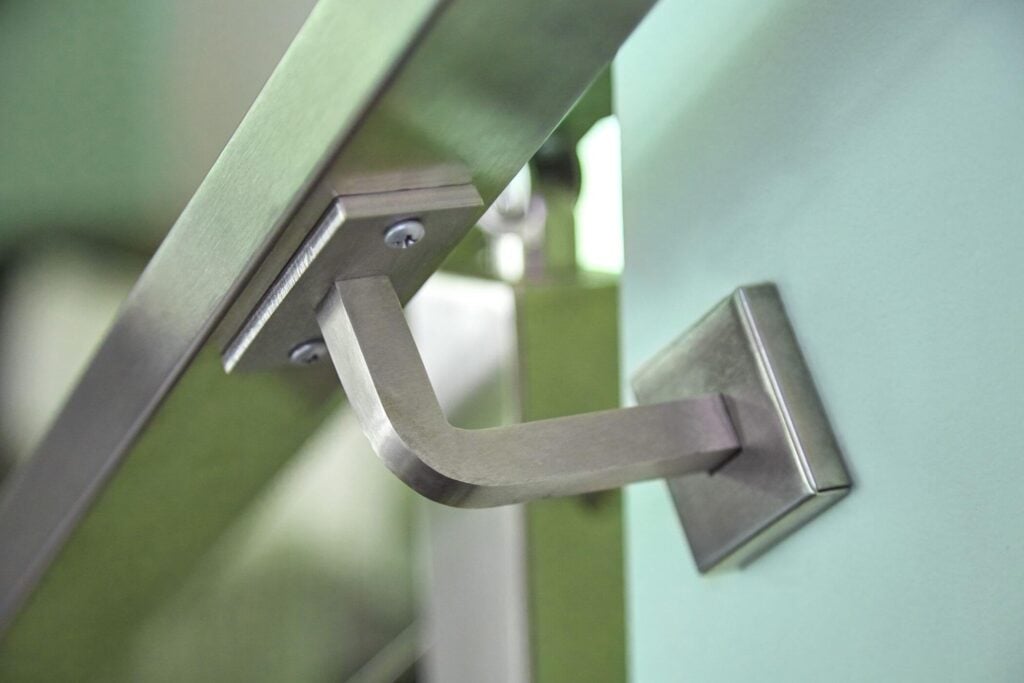
For best results, you’ll want to have one handrail terminate on the outside edge of the post and the other on the inside edge of the post. Make sure to be aware of this when measuring.
If your run length is greater than 20′, you’ll need to use multiple pieces of handrail. Be sure to measure to the center of the bracket the run will end on, not the end of it. Once you know the location of your post cuts, put painter’s tape on the handrail to guard the area and use a sharpie to mark your cut line.
Step 2 – Cutting Handrail
We recommend using a chop saw to cut your handrail. Make sure to use a blade suitable for the material your handrail is made from. For example, when cutting stainless steel or aluminum handrail, we recommend using a diamond tipped saw blade. As always, secure the handrail with clamps to keep it from jumping and use both ear and eye protection. Now, line-up the end caps with the opening in your handrail and, using a dead blow hammer, tap it into place. Since the handrail comes with one end finished, you will only need to do this on one side of the handrail.Step 3 – Mounting Handrail
Place the cut, capped handrail on top of the handrail brackets , making sure it’s in the desired position. Then, clamp the handrail to the outside handrail brackets on the first and last post of the run. If you are mounting to a corner post, attach the clamps to one edge of the handrail bracket. Pre-drill all holes using a 9/64” drill bit. Once the holes have been pre-drilled, use the provided mounting screws to attach the handrail. Now, move the clamps to the inside handrail brackets on the same posts. For corner posts, move the clamp to the other edge of the handrail bracket. Pre-drill and attach the mounting screws in the same way that you just did. It may be easiest to remove the handrail brackets after you’ve installed at least one mounting screw on each side. This will let you access the middle holes as well. You’ve installed the first handrail in your system! We recommend working one handrail at a time, rather than cutting all of your handrail first. When you mount handrail, it will pull the posts together, securing the system. If you cut all your handrail first, this could cause the measurements to be incorrect.Installing Cable Wire & Tensioning
Before you begin, make sure that your posts and handrails are firmly mounted and your foot covers are on your posts.
We provide most of the tools needed for this installation. You just need to make sure you have a tape measure and a sharpie handy.
Step 1 – Determining Run Type
There are 4 different types of runs that you can have with Signature Cable Railing. You likely have two or more of those types of runs in your whole system. To determine the type of each run, lay out the mounting kits beside each of your posts. On each run, you’ll have tensioning kits at each of your end posts and sleeve kits on each of side of your pass through posts.Step 2 – Measuring Cables
You’ll need to cut your cables at different lengths depending on which run type you have. You’ll begin by taking the measurement of your first run, starting with one tension end and proceeding to the next tension end. Notice that, if you have an “H” or “G” post that transitions from a stairway going up to a level balcony, your run does not start and stop but passes through the post. In this case, you’ll measure from the outside of the post at the bottom of the stairway to the outside of the post at the top of the stairway. Then, you’ll measure from the outside of that level transition post to the level transition post where the run terminates.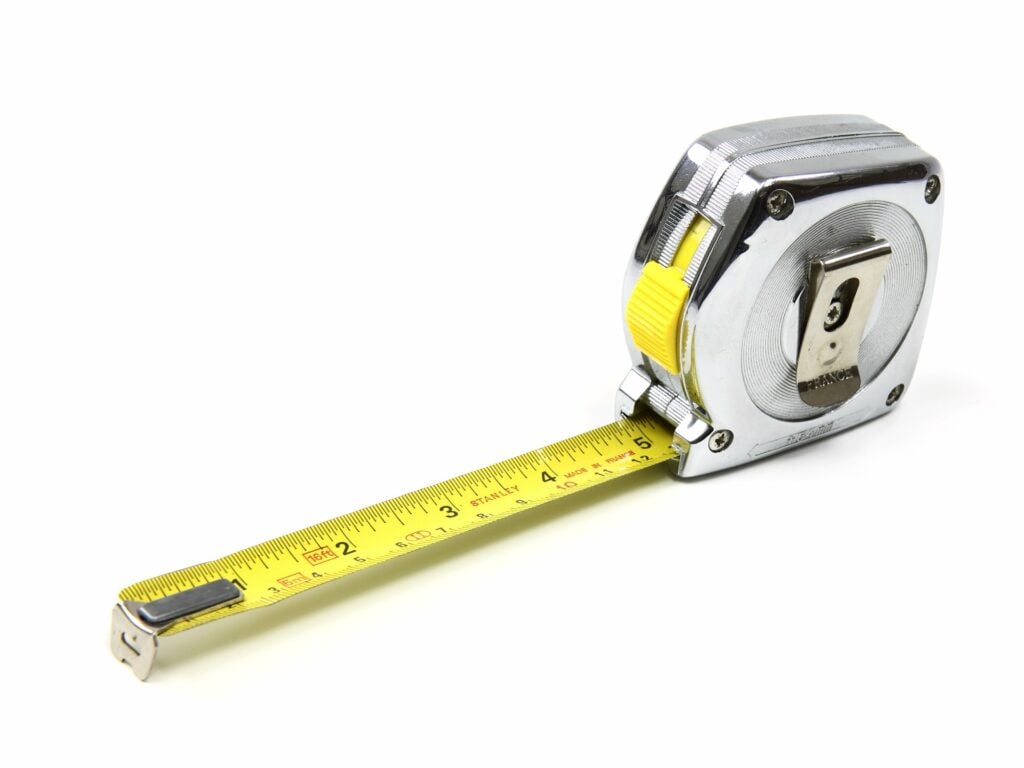
Once you have the measurements of your first run, you’ll need to subtract one of the following amounts, depending on what tensioning kits that run is using.
- Level Tension Kit to Level Tension Kit – 2 ½”
- Angle Tension Kit to Angle Tension Kit – 1 ½”
- Angle Tension Kit to Level Tension Kit – 2” ⅛”
- Level Tension Kit to KeyMount Kit – 2 ¾”
- Angle Tension Kit to KeyMount Kit – 2 ⅛”
Step 3 – Cutting Cable
Using your cable cutters, cut the cable at that spot. You may find it easiest to keep one of the handles on the floor, and push down on the top handle. This will help you get more leverage and save you some strain on your forearms. Now, you’ll just need to repeat those steps for each of your separate runs of cable.How To Tension Your Cable
Make sure that all of your posts and handrail are mounted and that your cables are cut to the lengths specified above.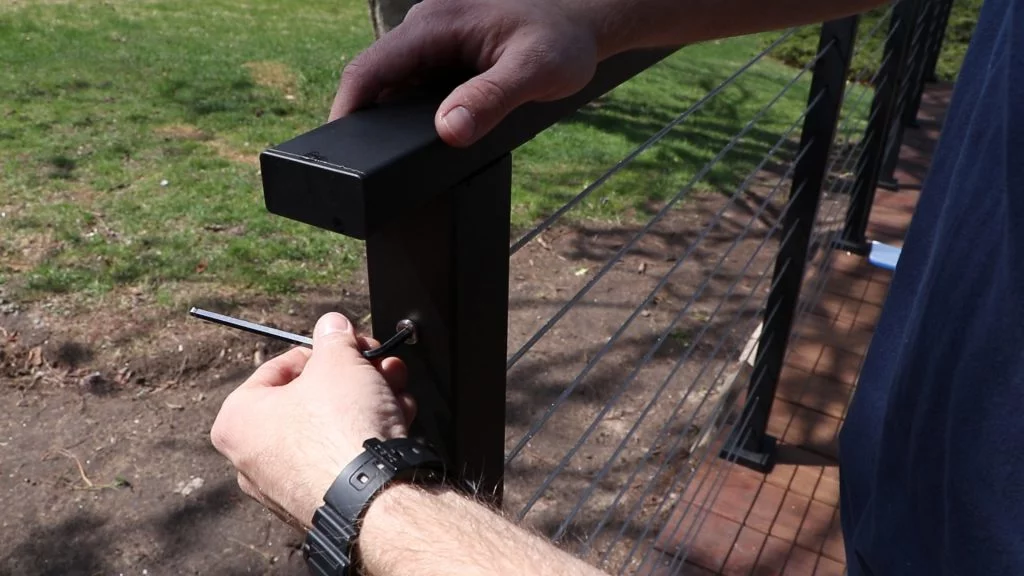
KeyMount Kits
If your run utilizes keymount kits, we’ll start by installing those before we install the tension kits. Slide your adhesive sleeve or insert sleeve onto the cable, making sure the attaching side is facing the inside of the post. Crimp the keymount fitting onto the end of the cable, making sure that the “ears” on the keymount fitting are facing away toward the rest of the cable. Then, crimp the fitting onto the cable, making sure to crimp twice. Now, put the keymount fitting into the hole that has been milled with notches to match the keymount fitting. Then, turn the fitting 90 degrees so that the “ears” can’t pull out of the post when it is pulled tight. Repeat this step for each of the cables on that run.Tension Kits
If you had a keymount fitting on one end, you must have a tension kit on the other end. You may also have tension kits on each end. If one end of your run has already been attached, make sure, before you run the cable through the intermediate posts, you put your adhesive and insert sleeves onto the cable. Make sure you also put your adhesive or insert sleeve onto the cable for the attachment post. Now, crimp your threaded crimp fitting onto the end of the cable, making sure to crimp twice. Then put your tension receiver through the back side of the post and meet it with the threaded crimp fitting coming from the inside of your post.If this is an angled run,make sure you put your angle washer onto the tension receiver before inserting it into the post. On angled runs, it is helpful to use the guidepin to help the threaded crimp fitting and tension receiver meet. Slide the guide pin through the back of the tension receiver and into the threaded crimp fitting. This will make sure they meet correctly.
Now, take the provided insert tool and slide it into the hole so that the tabs fit into the slots on the threaded crimp fitting. Hold the insert tool with one hand to keep the cable from spinning while you turn your tension receiver two full revolutions onto the threaded crimp fitting with the provided allen wrench. Do not tighten the cables all the way until each cable in the run is installed.Now repeat these steps for each of your runs.
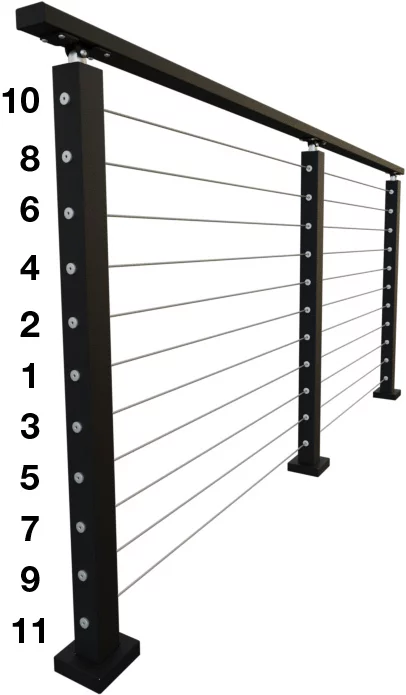
Tensioning Once each of the cables in the run have been installed, we need to back through and make sure each cable is fully tightened. Use the insert tool again to hold the threaded crimp fitting and then use the allen wrench to tighten the cables, starting with the middle cable in a run and following this diagram.
